Project 3 required teams to create a physical prototype that solves an everyday problem. Prototypes were based on the Arduino programmable circuit board, and our team went through an ideation process similar to that employed for previous projects.
Memory Pouch
For the first stage of the design process, our team was required to produce 10 sketches, individually, of an initial idea for our prototype. Our 10 best ideas from this stage are outlined in the sketches below.
Sketch 1 involved the idea we ultimately decided to implement- a visual notification system for packing up a backpack.
Sketch 2 illustrates a device that notifies the user via a phone notification when a load of laundry is done.
Sketch 3 was one of my individual sketches, in which I described a device that acts as a visual doorbell; whenever a door bell is pressed, a lamp equipped with a sound sensor is lit up, notifying the user (who is hard of hearing) that someone is at the door.
Sketch 4 depicts a weather detecting device that tells the user ow to dress according to how cold it is outdoors.
Sketch 5 illustrates a timer device that uses a motion sensor to determine when a user begins to get dressed, and then flashes a red light once the pre-set time is up.
Sketch 6 shows a button that allows any item connected to it to make a buzzing noise. The buzzer would be connected to the user's phone such that they can activate the buzzer remotely, to find the item if it is lost.
Sketch 7 depicts a capsule machine that produces a capsule with a motivational message in it when the user operates it using a joystick. This device could be used to combat anxiety, or simply to make the user feel better.
Sketch 8 illustrates a visualization system made up of Toio robots that models a journey's progress (e.g. a package being delivered to the user, or a friend on their way to the user's home) on a map.
Sketch 9 involves the idea of a visual notification system for a computer; instead of the regular on-screen notification, the computer sends a signal to the Arduino whenever a notification is sent in, which then causes a connected lamp to flash red. Whenever the lamp isn't flashing red, it functions as a simple colour-shifting lamp.
Sketch 10 (outlined in the 2 sketches above) describes a device that helps people who work in a stationary environment with computers for long periods of time. The device beeps occasionally to enable to user to look away from the screen for a few seconds, and emits a louder, incessant beeping sound every 20 minutes that requires the user to stand up and walk to it to turn off the sound. At this point, the device will also audibly guide the user through a series of stretches.
Our individual sketches for our physical prototype were largely ways of notifying a user of what was going on in their surroundings (sketches 1, 2, 3 and 9) and helping them with very everyday issues that people face, such as keeping track of/finding lost items (sketches 1 and 6) and being well prepared for the day before leaving the house (sketches 4 and 5).
For the next stage of the ideation process, our team was required to create 10 more detailed/variation sketches based on those created during the first stage. After reviewing all our individual sketches from this stage of ideation, we decided that the idea we liked the most was the LED strip notifier idea (see Sketch 1 above). The sketches based on this idea can be seen below.
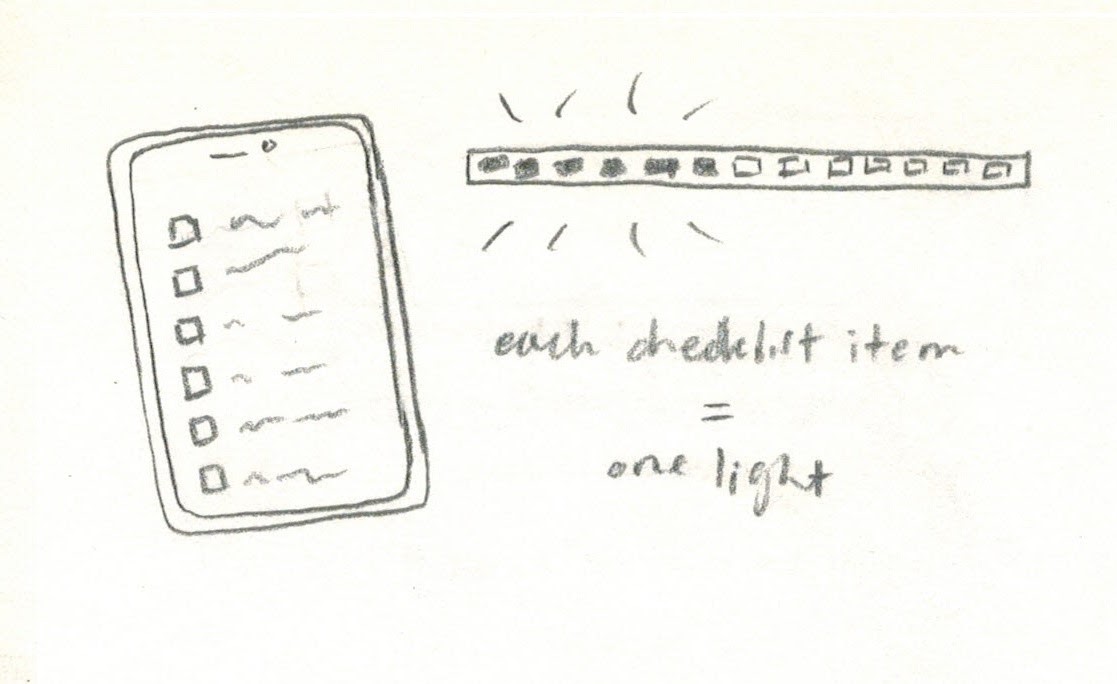
The first variation sketch describes the idea of having a light on an LED strip correspond to an item on a user's to-do list.
The second variation sketch shows an idea where an LED strip is used to help a user keep track of chores around the house by turning one light off as the chores are completed, one at a time. These chores would be stored as a checklist on the user's phone, which would be linked to the LED strip.
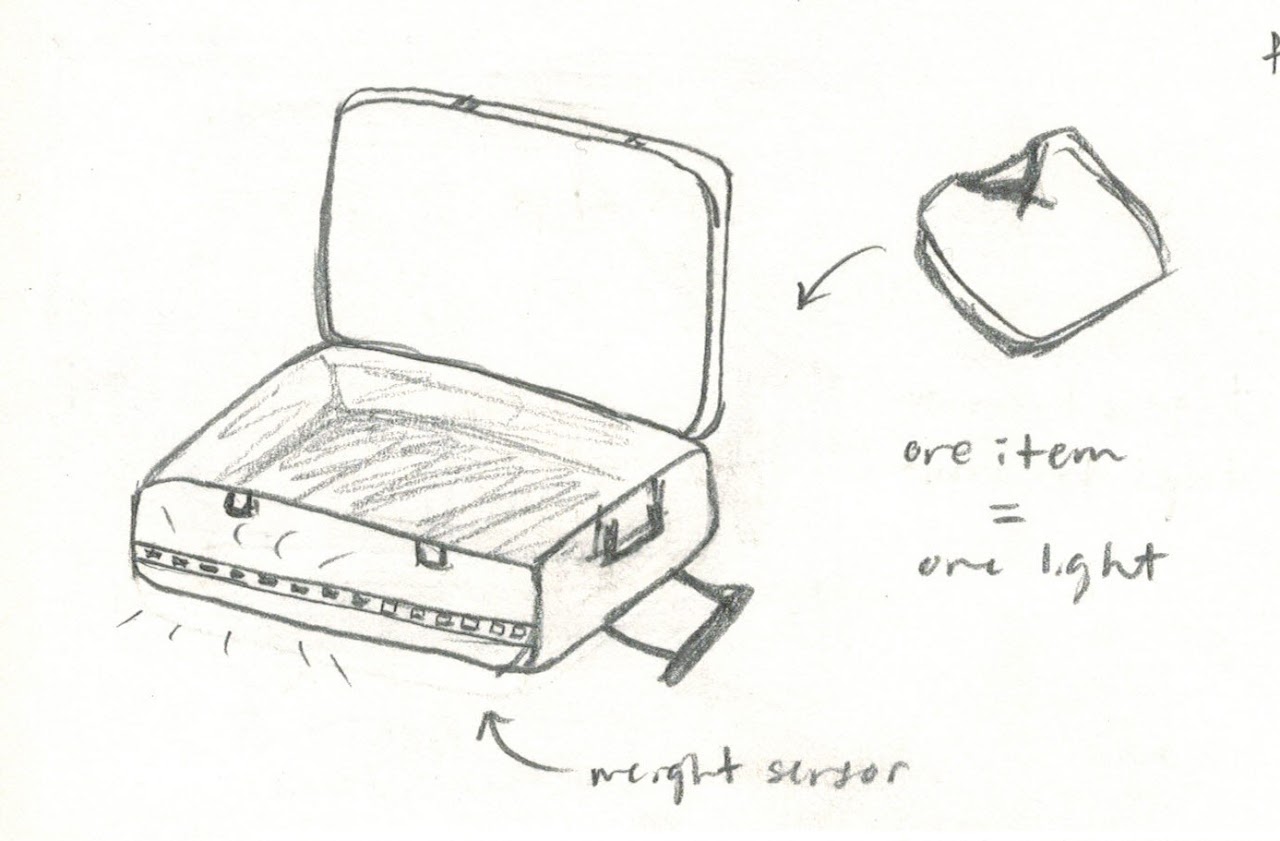
The third variation sketch involves the idea of having each light on an LED strip that is along the perimeter of a suitcase turn off as it gets closer to its "full" weight.
The fourth variation sketch, which was one of my sketches for this stage, illustrates an idea similar to the previous sketch of an LED strip being used to pack a suitcase. The LED strip is toggled on and off by a button on the suitcase, and is linked to a phone checklist such that whenever an item is put away and checked off the list, a light flashes green. All lights will be green once all items on the user's checklist are checked off and in the suitcase. The user can then turn off the lights by pressing the button.
The fifth variation expands on the previous few sketches by extending it to be used on multiple types of items, so that it is not limited to only one type of item.
The sixth sketch involves using a weight sensor to keep track of items that are put into a suitcase, and incorporates the idea of corresponding each item with a light on the LED strip.
Sketch 7 involves the idea of also using a button to set the suitcase's final weight, in addition to the original LED strip idea.
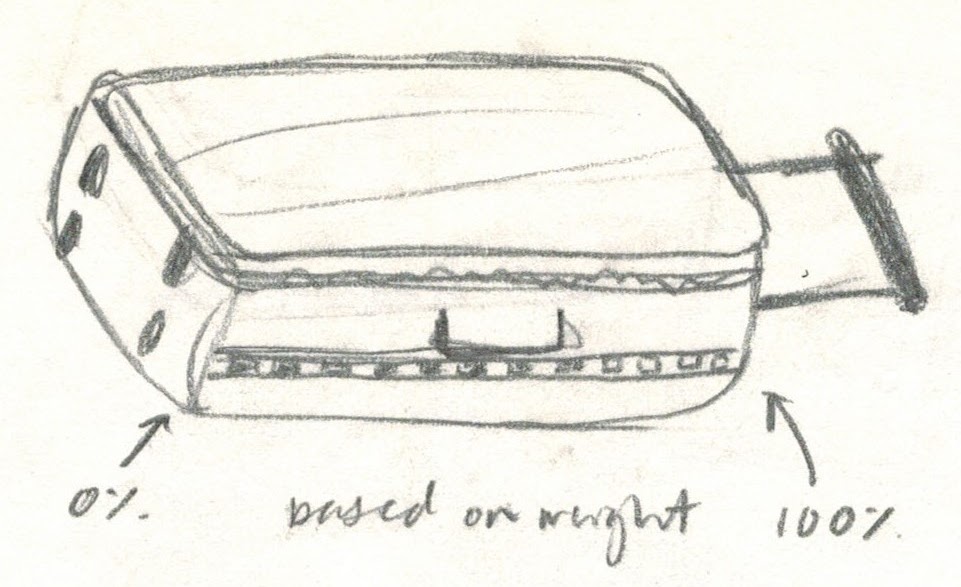
Sketch 8 depicts the idea of linking the LED lights with the weight of the bag, such that the LED strip functions as a progress bar that is only full once the optimal weight is reached. This enables the user to be sure they haven't forgotten anything that they should have packed.
Sketch 9 is a detailed sketch of the original idea, describing how we could implement the prototype.
Sketch 10 is another detailed sketch of the original idea that shows the cross section of a backpack fitted with the prototype.
We created a storyboard to illustrate our idea:
For our implementation, we implemented the Memory Pouch as depicted in Sketch 10 and in the image and demo video below. We connected an Arduino to a breadboard fitted with a button and individual LEDs, abandoning the LED strip for simplicity, and aligned our LEDs to correspond to each fabric pouch on the panel that made up the Memory Pouch. Each light is on whenever its corresponding pouch is empty, and turns off when it is occupied (the item comes in contact with a button to turn off the associated LED). This behaviour was achieved by placing a Lego piece on the button, and aligning this setup to a hole underneath the associated pouch, so that the item placed into the pouch would push the button down to keep the LED off while the pouch is occupied.